

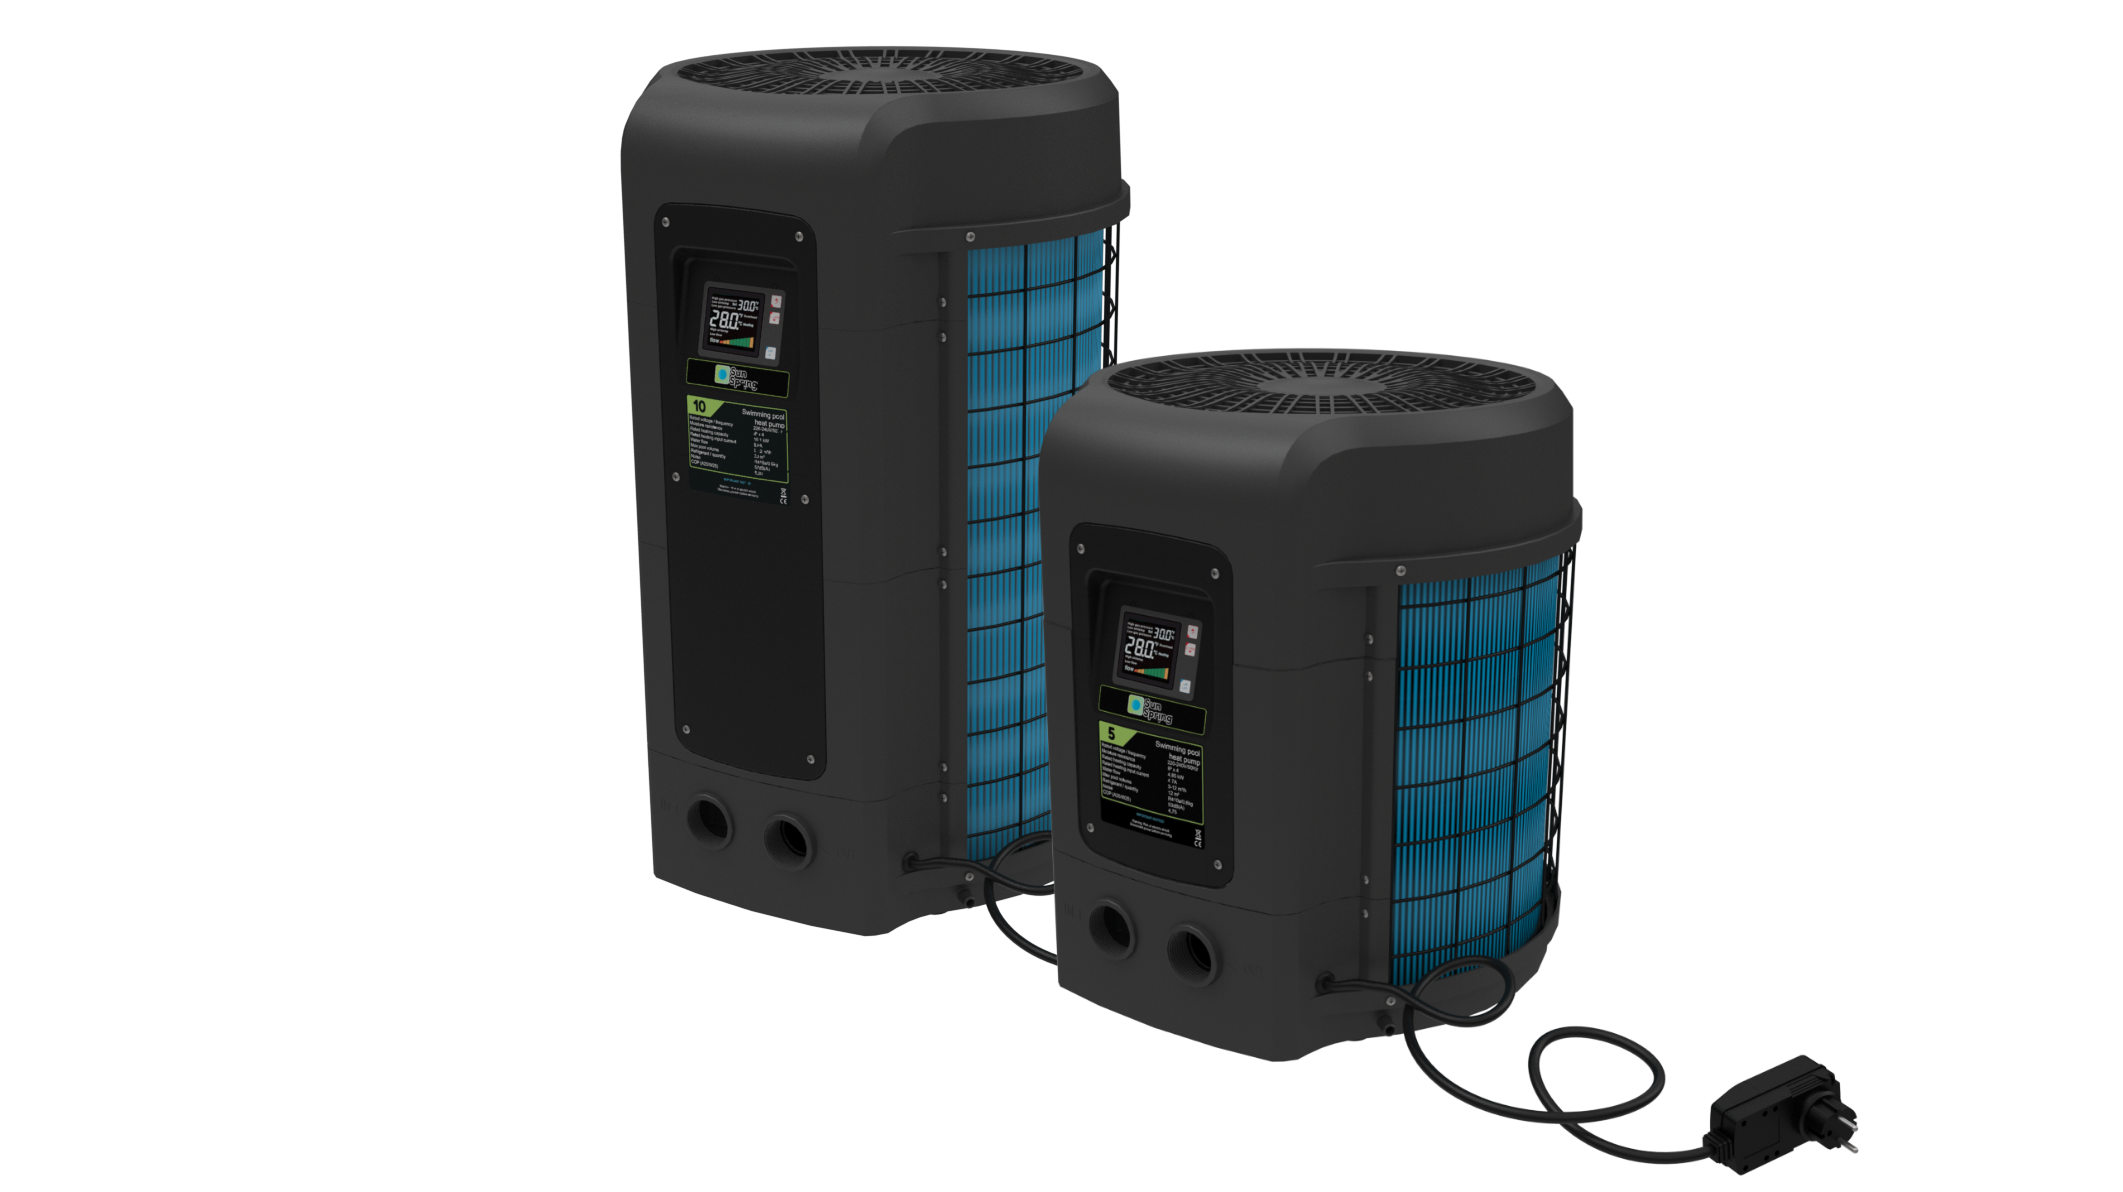

Plug & Play
Trendsetter for above ground pools
Children love playing in the water but they quickly get cold. Constantly jumping in the pool and climbing out, drying up and starting all over again certainly sounds familiar… In order to guarantee hours of fun, House of DURATECH has developed the ideal solution: the Sun Spring heat pumps.
This model is easy to acquire as you can buy it directly in your pool shop. No complicated connections and no need for tools thanks to the clever Plug and play system. Connect the pipes of your filter pump to the in- and outlet of your heat pump. Finish the installation by putting the power plug – equipped with a fuse – in a power socket. The heating process can now start. It is as simple as that. When the swimming season is over, drain the heat pump of excess water and store it in your garage or garden shed. Have you forgotten to remove the excess water from your device? Do not panic! The heat pump is equipped with the unique NoFrost™ system that avoids freezing. A pleasant pool water temperature guarantees hours of water fun for you and your family even if the weather is cloudy. Do not let this trendsetter pass you by!
Download your manual here!

Features
Some distinctive features of our product
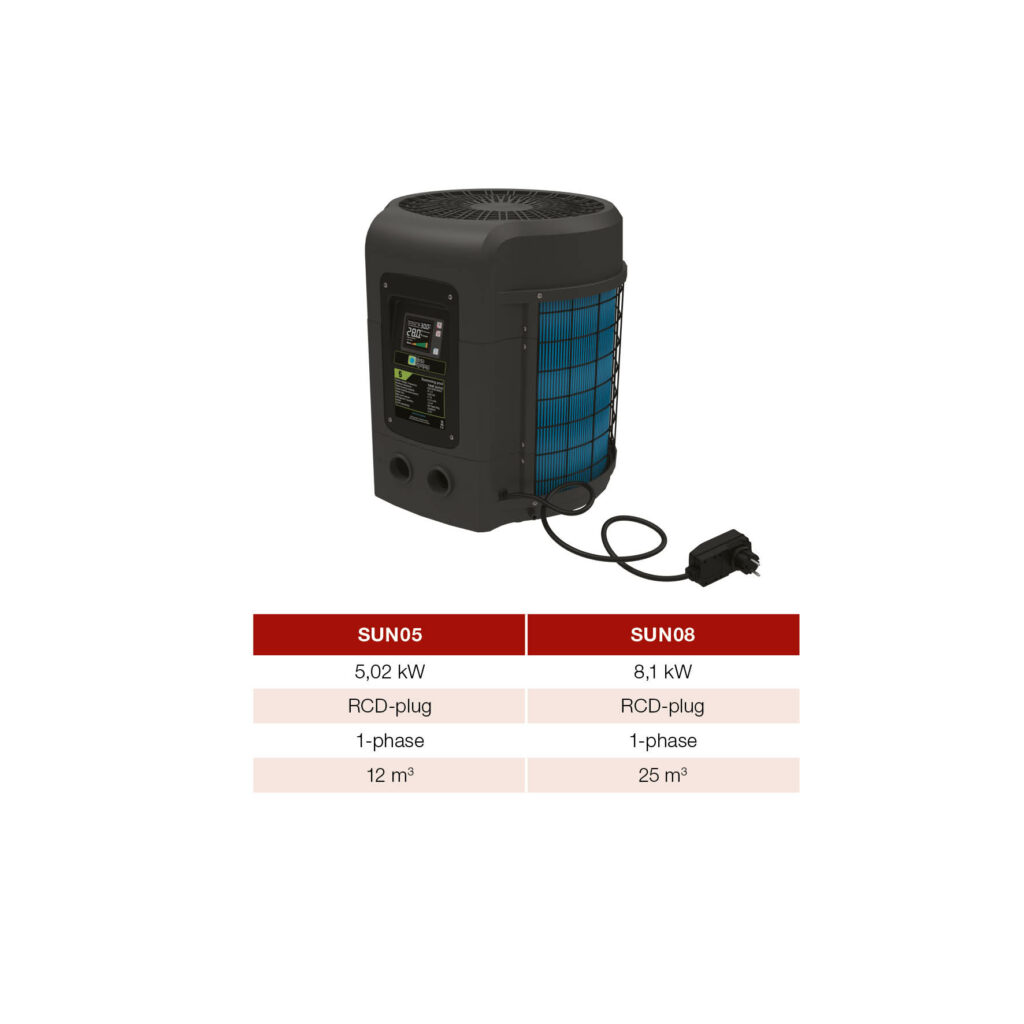
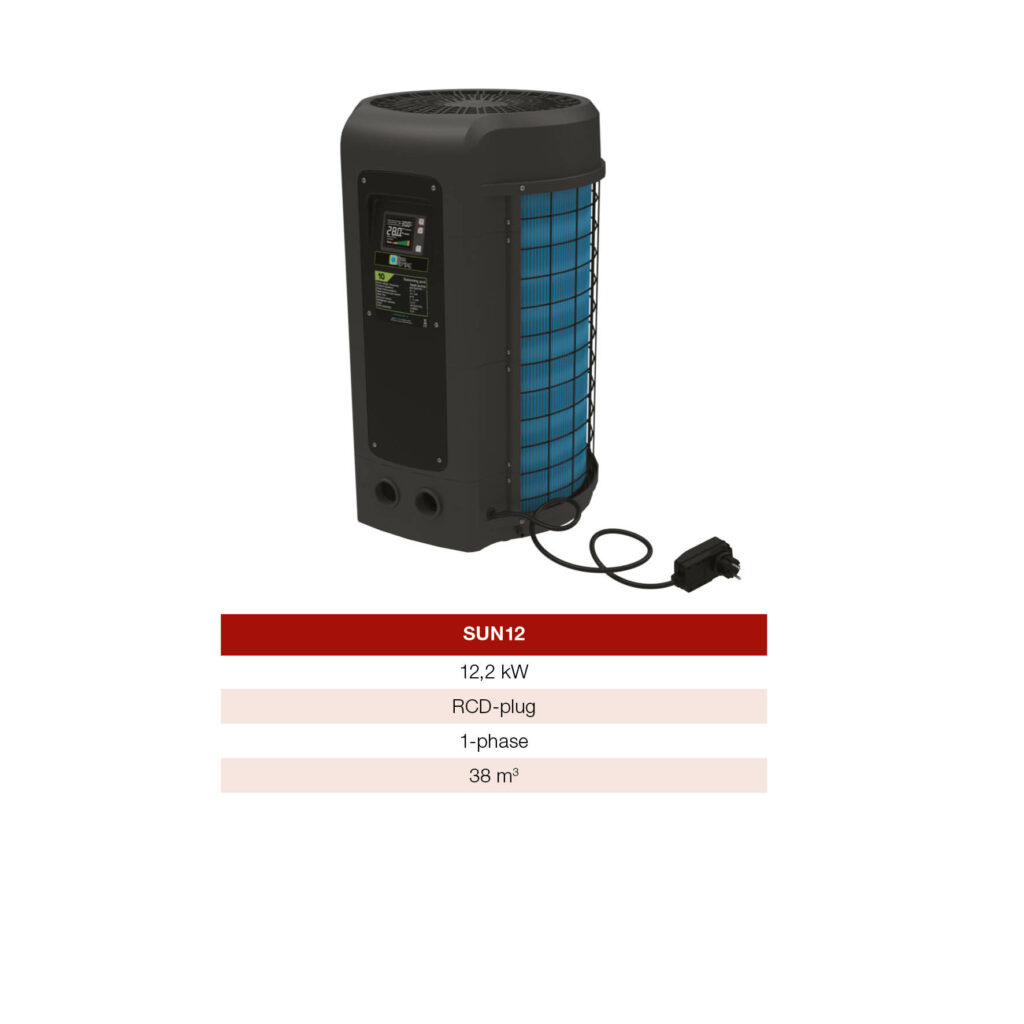
High energy efficiency – COP up to 5,6
Easy to install and use – small footprint due to vertical fan design
Full-flow technology – no bypass needed
Intuitive easy to use control panel
Will operate in ambient air as low as +8°C
Titanium heat exchanger is resistant to corrosion from pool chemicals
Slide me to see the Sun Spring heat pumps
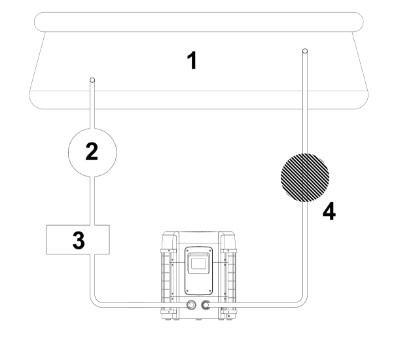
- Swimming pool
- Water pump
- Filter
- Water treatment
Attention: Distance to the swimming pool: 2m
Installation and connections
The Sun Spring heat pumps are designed and constructed to provide long performance life when installed and operated properly under normal conditions. Periodic inspections are important to keep your heat pump running safely and efficiently through the years. The following basic guidelines are suggested for your inspection:
- Make sure the front of the unit is accessible for future service.
- Keep the surrounding areas of the heat pump clear of all debris.
- Keep all plants and shrubs trimmed and away from the heat pump.
- Keep lawn sprinkler heads from spraying on the heat pump to prevent corrosion and damage. Use a deflector if needed.
- If the unit is installed under a very sharp roof pitch or under a roof without a gutter, a gutter or diverter should be fitted to prevent excessive water from pouring down onto the unit.
- Do not use the heat pump if any part has been submerged under water. Immediately call a qualified professional technician to inspect the heat pump and replace any part of the control system, which has been submerged.
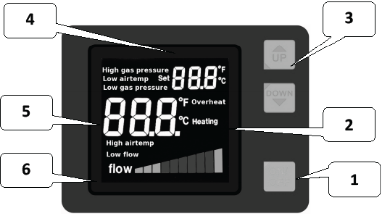
- ON / OFF switch
- Operation mode
- Arrow keys
- Set water temperature
- Pool temperature
- Display water flow
- The indication ‘OFF’ at the location of the pool water temperature
- The temperature wanted for heating
- Eventual error messages
When ON the display is showing the following information:
- The temperature wanted for heating
- The pool water temperature
- The indication ‘Heating’ when the unit is heating the water
- A graphical representation of the water flow: the flow bar (see further)
Setting of the desired temperature
The desired temperature can directly be set with the arrow keys. The setting will automatically be stored in memory.
A choice can be made between °C and °F as follows:
- Cut electrical power to the unit
- Press both arrow keys at the same time and restore electrical power to the unit, than release the keys.
The flow bar
Winterizing
- Turn off the electrical power to the heat pump at the main breaker panel.
- Shut off the water supply to the heat pump.
- Disconnect the water inlet and outlet and let the water drain from the heat pump.
- Re-connect the water inlet and outlet loosely to prevent debris entering the connections.
Attention: failure to winterize could cause damage to the heat pump and will void warranty
Spring startup
- Inspect the system for any debris or structural problems.
- Connect the water inlet and outlet unions firmly.
- Turn on the filter pump to supply water to the heat pump.
- Restore electrical power to the heat pump and switch it ON.
- Check the water supply to the unit often. Low water flow and air entering into the system should be avoided, as this will diminish the units’ performance and reliability. You should clean the pool/spa filter regularly to avoid damage to the unit as a result of the dirty or clogged filter.
- The area around the unit should be dry, clean and well ventilated. Clean the side heating exchanger regularly to maintain good heat exchange and to save energy.
- Check the power supply and cable connection often. Should the unit begin to operate abnormally or do you smell something unusual around the electrical compartment, switch off the heat pump and have it replaced on a timely manner.